In Governance Intranet when you move to a new page you need to click in a field to enter information or select an entry from different types of fields (i.e. drop-down list fields, date picker fields, people picker fields, browse for a valid choice fields) .
To move to the next field on the screen, press the TAB key.
To move to the previous field on the screen, press SHIFT + TAB.
To move to another field on the page, click in that field using your mouse.
To enter information in a text field, click in the field and enter the information.
If your cursor is in a field that already contains information, you can edit the information by highlighting it and entering the new information. The existing information will automatically be replaced by whatever you type.
![]()
If a field is shaded or unavailable, then you may not enter or change anything in that field.
If there is an * asterisk next to the field name, then it is mandatory, i.e. you must complete it to complete the page. If you do not complete it, you will get an error message asking you to make an entry in all required fields.
To make it easier to carry out tasks in the Governance Intranet, many fields allow you to select an entry from a drop-down list, from a calendar date picker or by typing part of a name and selecting from suggested entries that appear.
|
Field type |
Description |
To use: |
|
Drop-down list fields allow you to select items and have a drop-down arrow, e.g. |
|
|
|
Date fields allow you to select items from a calendar which appears below the field and defaults to the current month, e.g. |
|
|
|
People picker fields are for entering names of people who may have access to the Governance Intranet in different roles, such as committee members, servicing officers, chair persons, policy officers, etc. and who may be associated with committees or documents in the Governance Intranet. The buttons at the end of the field allow you to
Note: Before entering names, ensure that you have the correct name of the person and that the person has UCT network access.
|
Note:
|
|
|
Browse for a valid choice fields are for selecting from a list of valid terms for a specific metadata item. The Note: If the list does not cater for your needs, you can request an addition to the term set by sending feedback to the metadata manager. |
|
 .
. drop-down arrow.
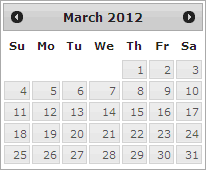 .
. right arrow or
  left arrow to display the relevant month.
 .
.


 .
.